Overview
Want a reminder your bill is due? How about a prompt that your bill is now past due? Interested in knowing your payment posted?
Notifications in SmartHub can do exactly that – email or text important information about your account. You tell SmartHub when and how to contact you. Some notifications even allow you to get specific, such as setting the numbers of days to remind you before your bill is due. Of course, to send you a notification, you need to have contact information stored in the system. Be sure you’ve added contacts before setting your notifications.
Some common notifications include –
• Bill Available
• Payment Due
• Payment Confirmation
• Delinquent Notice
• Credit Card Expiration
• Power Outage
Note: Available notifications in SmartHub are set by your provider. Specific notifications shown in this document may vary from what you see when you log into SmartHub. Some options are also specific to your account type. For example, prepaid customers might see different options than other customers.
Sign Up for Notifications
1. From the home page, click the Notifications tab.

2. Click the Manage Notifications link in the far left menu.
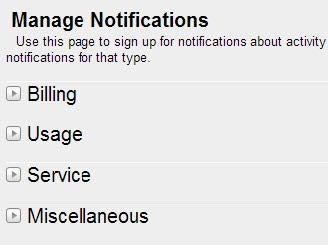
The Manage Notifications page appears, displaying various categories of notifications, including Billing, Usage, Service, and Miscellaneous.

3. Click the arrow to the left of the desired Category.
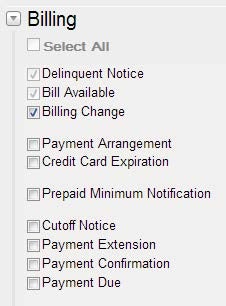
All the available notifications for that category appear.

4. Check the box next to each notification you wish to receive.
Note: You can also check Select All to subscribe to all notifications in that category.
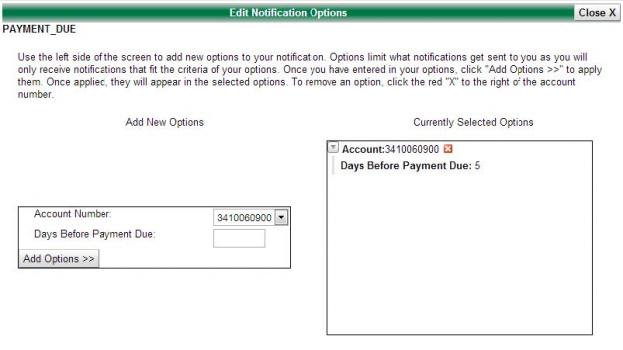
If Options are available for a selected notification, the Edit Notification Options window appears.
5. Follow the onscreen instructions to set the available options for this notification.

After setting your options, the Edit Notification Options window closes, returning you to the Manage Notifications screen.
Your notification will now be sent to the email address you use as your username.
Change Contact(s)
1. From the Manage Notifications page, click the arrow to the left of the appropriate category.
The notifications under that category appear.
2. Click Edit to the right of the appropriate notification.

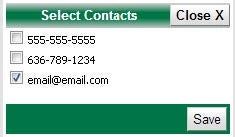
The Select Contacts window appears. Here you can change the contact or add additional contacts as required.
3. Uncheck the current contact, if desired.

4. Check the contact(s) where you want this notification sent.
5. Click the Save button.
The Select Contacts window closes and you return to the Manage Notifications page.
Change Options
1. From the Manage Notifications page, click the arrow to the left of the desired category.
The notifications under that category appear.
2. Click the Options link, located on the far right of the appropriate notification.
The Edit Notifications Options window appears.

3. Follow the onscreen instructions to customize the notifications you will receive.
After setting your options, the Edit Notification Options window closes, returning you to the Manage Notifications screen.
Stop a Notification
1. From the Manage Notifications page, click the arrow to the left of the desired category.
The notifications under that category appear.

2. Uncheck the box next to the notification you no longer wish to receive.

3. You selection is automatically saved and that notification will no longer be sent.
Note: Some notifications may be required by your provider and cannot be unchecked (see below);
however, you can still edit the notification contact or options.

